
How to build an HTML calculator app from scratch using JavaScript
This is an epic article where you learn how to build a calculator from scratch. We’ll focus on the JavaScript you need to write—how to think about building the calculator, how to write the code, and eventually, how to clean up your code.
By the end of the article, you should get a calculator that functions exactly like an iPhone calculator (without the +/- and percentage functionalities).
The prerequisites
Before you attempt follow through the lesson, please make sure you have a decent command of JavaScript. Minimally, you need to know these things:
- If/else statements
- For loops
- JavaScript functions
- Arrow functions
&&and||operators- How to change the text with the
textContentproperty - How to add event listeners with the event delegation pattern
Before you begin
I urge you to try and build the calculator yourself before following the lesson. It’s good practice, because you’ll train yourself to think like a developer.
Come back to this lesson once you’ve tried for one hour (doesn’t matter whether you succeed or fail. When you try, you think, and that’ll help you absorb the lesson in double quick time).
With that, let’s begin by understanding how a calculator works.
Building the calculator
First, we want to build the calculator.
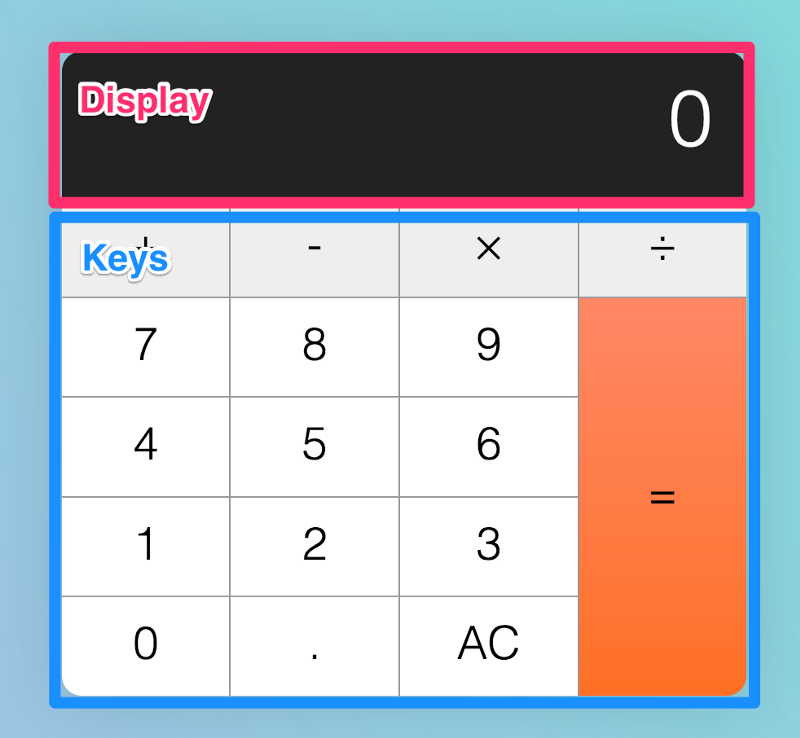
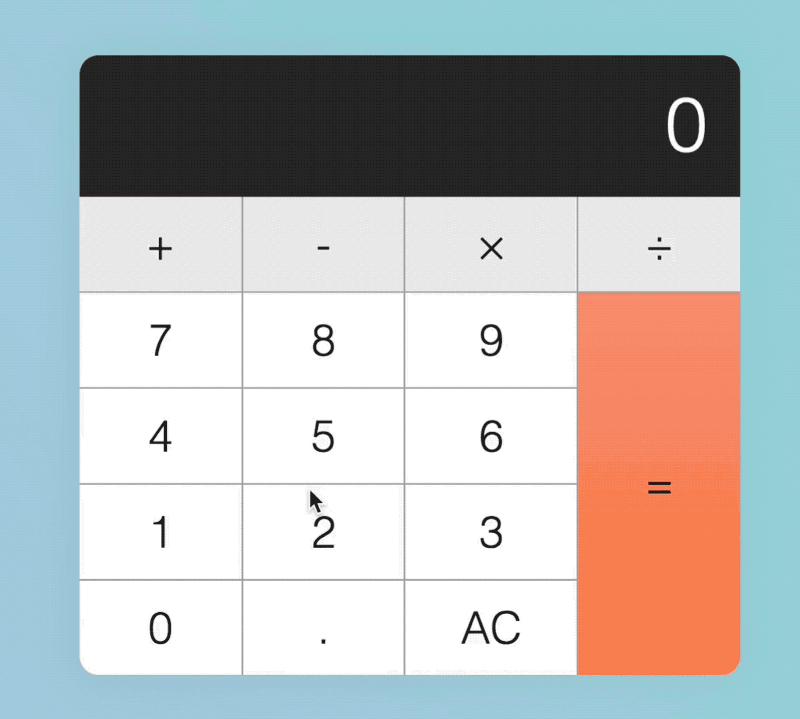
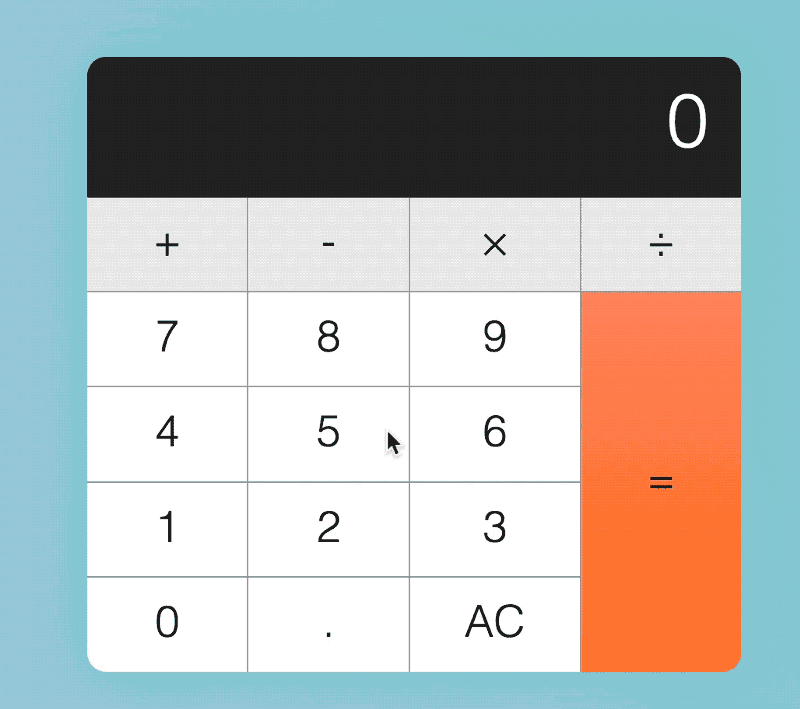
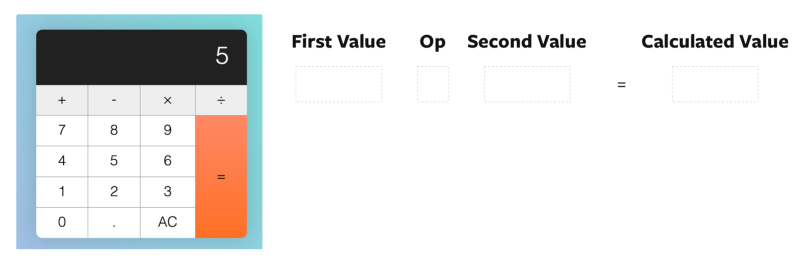
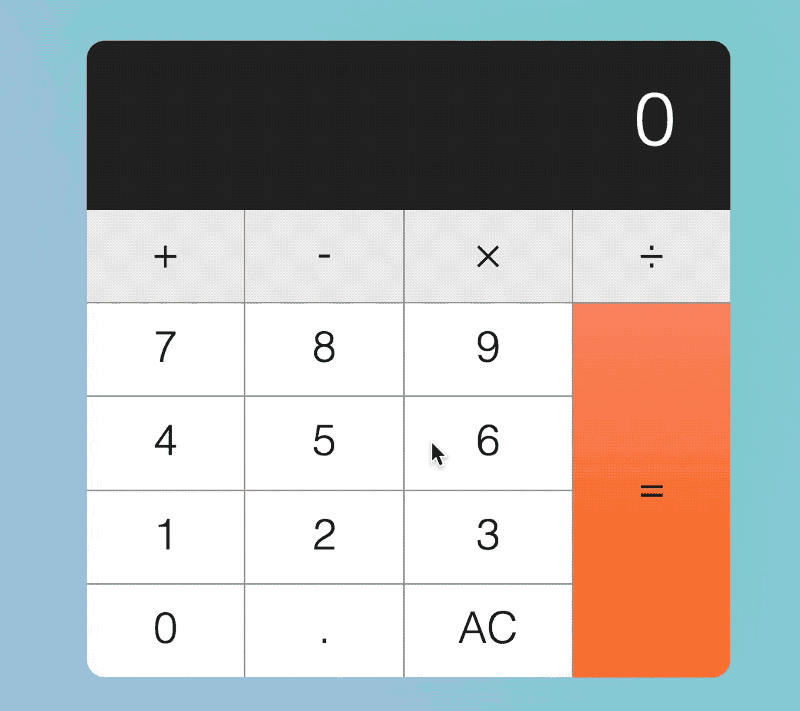
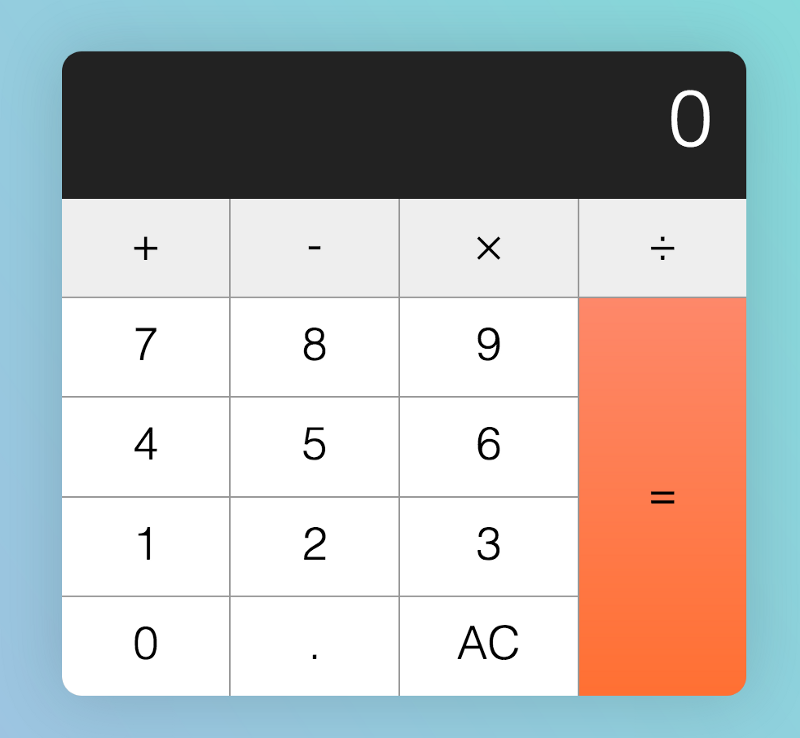
The calculator consist of two parts: the display and the keys.

<div class=”calculator”>
  <div class=”calculator__display”>0</div>
  <div class=”calculator__keys”> … </div>
</div>
We can use CSS Grid to make the keys, since they’re arranged in a grid-like format. This has already been done for you in the starter file. You can find the starter file at this pen.
.calculator__keys {
  display: grid;
  /* other necessary CSS */
}
To help us identify operator, decimal, clear, and equal keys, we’re going to supply a data-action attribute that describes what they do.
<div class="calculator__keys">
<button class="key--operator" data-action="add">+</button>
<button class="key--operator" data-action="subtract">-</button
<button class="key--operator" data-action="multiply">×</button>
<button class="key--operator" data-action="divide">÷</button
<button>7</button>
<button>8</button>
<button>9</button>
<button>4</button>
<button>5</button>
<button>6</button>
<button>1</button>
<button>2</button>
<button>3</button>
<button>0</button>
<button data-action="decimal">.</button>
<button data-action="clear">AC</button>
<button class="key--equal" data-action="calculate">=</button>
</div>Listening to key-presses
Five things can happen when a person gets hold of a calculator. They can hit:
- a number key (0–9)
- an operator key (+, -, ×, ÷)
- the decimal key
- the equals key
- the clear key
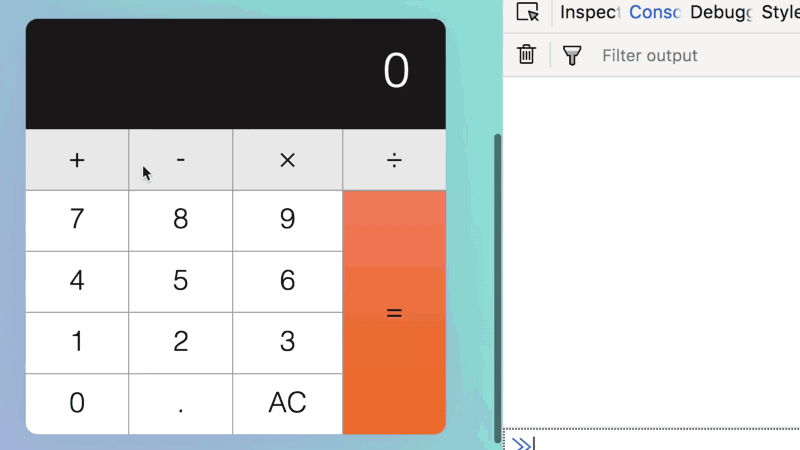
The first steps to building this calculator are to be able to (1) listen for all keypresses and (2) determine the type of key that is pressed. In this case, we can use an event delegation pattern to listen, since keys are all children of .calculator__keys.
const calculator = document.querySelector(‘.calculator’)
const keys = calculator.querySelector(‘.calculator__keys’)

keys.addEventListener(‘click’, e => {
 if (e.target.matches(‘button’)) {
   // Do something
 }
})
Next, we can use the data-action attribute to determine the type of key that is clicked.
const key = e.target
const action = key.dataset.action
If the key does not have a data-action attribute, it must be a number key.
if (!action) {
  console.log('number key!')
}
If the key has a data-action that is either add, subtract, multiply or divide, we know the key is an operator.
if (
  action === 'add' ||
  action === 'subtract' ||
  action === 'multiply' ||
  action === 'divide'
) {
  console.log('operator key!')
}
If the key’s data-action is decimal, we know the user clicked on the decimal key.
Following the same thought process, if the key’s data-action is clear, we know the user clicked on the clear (the one that says AC) key. If the key’s data-action is calculate, we know the user clicked on the equals key.
if (action === 'decimal') {
  console.log('decimal key!')
}

if (action === 'clear') {
  console.log('clear key!')
}

if (action === 'calculate') {
  console.log('equal key!')
}
At this point, you should get a console.log response from every calculator key.
Building the happy path
Let’s consider what the average person would do when they pick up a calculator. This “what the average person would do” is called the happy path.
Let’s call our average person Mary.
When Mary picks up a calculator, she could hit any of these keys:
- a number key (0–9)
- an operator key (+, -, ×, ÷)
- the decimal key
- the equal key
- the clear key
It can be overwhelming to consider five types of keys at once, so let’s take it step by step.
When a user hits a number key
At this point, if the calculator shows 0 (the default number), the target number should replace zero.

If the calculator shows a non-zero number, the target number should be appended to the displayed number.

Here, we need to know two things:
- The number of the key that was clicked
- The current displayed number
We can get these two values through the textContent property of the clicked key and .calculator__display , respectively.
const display = document.querySelector('.calculator__display')

keys.addEventListener('click', e => {
  if (e.target.matches('button')) {
    const key = e.target
    const action = key.dataset.action
    const keyContent = key.textContent
    const displayedNum = display.textContent
    // ...
  }
})
If the calculator shows 0, we want to replace the calculator’s display with the clicked key. We can do so by replacing the display’s textContent property.
if (!action) {
  if (displayedNum === '0') {
    display.textContent = keyContent
  }
}
If the calculator shows a non-zero number, we want to append the clicked key to the displayed number. To append a number, we concatenate a string.
if (!action) {
  if (displayedNum === '0') {
    display.textContent = keyContent
  } else {
    display.textContent = displayedNum + keyContent
  }
}
At this point, Mary may click either of these keys:
- A decimal key
- An operator key
Let’s say Mary hits the decimal key.
When a user hits the decimal key
When Mary hits the decimal key, a decimal should appear on the display. If Mary hits any number after hitting a decimal key, the number should be appended on the display as well.

To create this effect, we can concatenate . to the displayed number.
if (action === 'decimal') {
  display.textContent = displayedNum + '.'
}
Next, let’s say Mary continues her calculation by hitting an operator key.
When a user hits an operator key
If Mary hits an operator key, the operator should be highlighted so Mary knows the operator is active.

To do so, we can add the is-depressed class to the operator key.
if (
  action === 'add' ||
  action === 'subtract' ||
  action === 'multiply' ||
  action === 'divide'
) {
  key.classList.add('is-depressed')
}
Once Mary has hit an operator key, she’ll hit another number key.
When a user hits a number key after an operator key
When Mary hits a number key again, the previous display should be replaced with the new number. The operator key should also release its pressed state.
To release the pressed state, we remove the is-depressed class from all keys through a forEach loop:
keys.addEventListener('click', e => {
  if (e.target.matches('button')) {
    const key = e.target
    // ...

    // Remove .is-depressed class from all keys
    Array.from(key.parentNode.children)
      .forEach(k => k.classList.remove('is-depressed'))
  }
})
Next, we want to update the display to the clicked key. Before we do this, we need a way to tell if the previous key is an operator key.
One way to do this is through a custom attribute. Let’s call this custom attribute data-previous-key-type.
const calculator = document.querySelector('.calculator')
// ...

keys.addEventListener('click', e => {
  if (e.target.matches('button')) {
    // ...

    if (
      action === 'add' ||
      action === 'subtract' ||
      action === 'multiply' ||
      action === 'divide'
    ) {
      key.classList.add('is-depressed')
      // Add custom attribute
      calculator.dataset.previousKeyType = 'operator'
    }
  }
})
If the previousKeyType is an operator, we want to replace the displayed number with clicked number.
const previousKeyType = calculator.dataset.previousKeyType

if (!action) {
  if (displayedNum === '0' || previousKeyType === 'operator') {
    display.textContent = keyContent
  } else {
    display.textContent = displayedNum + keyContent
  }
}
Next, let’s say Mary decides to complete her calculation by hitting the equals key.
When a user hits the equals key
When Mary hits the equals key, the calculator should calculate a result that depends on three values:
- The first number entered into the calculator
- The operator
- The second number entered into the calculator
After the calculation, the result should replace the displayed value.

At this point, we only know the second number — that is, the currently displayed number.
if (action === 'calculate') {
  const secondValue = displayedNum
  // ...
}
To get the first number, we need to store the calculator’s displayed value before we wipe it clean. One way to save this first number is to add it to a custom attribute when the operator button gets clicked.
To get the operator, we can also use the same technique.
if (
  action === 'add' ||
  action === 'subtract' ||
  action === 'multiply' ||
  action === 'divide'
) {
  // ...
  calculator.dataset.firstValue = displayedNum
  calculator.dataset.operator = action
}
Once we have the three values we need, we can perform a calculation. Eventually, we want the code to look something like this:
if (action === 'calculate') {
  const firstValue = calculator.dataset.firstValue
  const operator = calculator.dataset.operator
  const secondValue = displayedNum

  display.textContent = calculate(firstValue, operator, secondValue)
}
That means we need to create a calculate function. It should take in three parameters: the first number, the operator, and the second number.
const calculate = (n1, operator, n2) => {
  // Perform calculation and return calculated value
}
If the operator is add, we want to add values together. If the operator is subtract, we want to subtract the values, and so on.
const calculate = (n1, operator, n2) => {
  let result = ''

  if (operator === 'add') {
    result = n1 + n2
  } else if (operator === 'subtract') {
    result = n1 - n2
  } else if (operator === 'multiply') {
    result = n1 * n2
  } else if (operator === 'divide') {
    result = n1 / n2
  }

  return result
}
Remember that firstValue and secondValue are strings at this point. If you add strings together, you’ll concatenate them (1 + 1 = 11).
So, before calculating the result, we want to convert strings to numbers. We can do so with the two functions parseInt and parseFloat.
parseIntconverts a string into an integer.parseFloatconverts a string into a float (this means a number with decimal places).
For a calculator, we need a float.
const calculate = (n1, operator, n2) => {
  let result = ''

  if (operator === 'add') {
    result = parseFloat(n1) + parseFloat(n2)
  } else if (operator === 'subtract') {
    result = parseFloat(n1) - parseFloat(n2)
  } else if (operator === 'multiply') {
    result = parseFloat(n1) * parseFloat(n2)
  } else if (operator === 'divide') {
    result = parseFloat(n1) / parseFloat(n2)
  }

  return result
}
That’s it for the happy path!
You can grab the source code for the happy path through this link (scroll down and enter your email address in the box, and I’ll send the source codes right to your mailbox).
The edge cases
The hapy path isn’t enough. To build a calculator that’s robust, you need to make your calculator resilient to weird input patterns. To do so, you have to imagine a troublemaker who tries to break your calculator by hitting keys in the wrong order. Let’s call this troublemaker Tim.
Tim can hit these keys in any order:
- A number key (0–9)
- An operator key (+, -, ×, ÷)
- The decimal key
- The equals key
- The clear key
What happens if Tim hits the decimal key
If Tim hits a decimal key when the display already shows a decimal point, nothing should happen.
Here, we can check that the displayed number contains a . with the includes method.
includes checks strings for a given match. If a string is found, it returns true; if not, it returns false.
Note: includes is case sensitive.
// Example of how includes work.
const string = 'The hamburgers taste pretty good!'
const hasExclaimation = string.includes('!')
console.log(hasExclaimation) // true
To check if the string already has a dot, we do this:
// Do nothing if string has a dot
if (!displayedNum.includes('.')) {
  display.textContent = displayedNum + '.'
}
Next, if Tim hits the decimal key after hitting an operator key, the display should show 0..
Here we need to know if the previous key is an operator. We can tell by checking the the custom attribute, data-previous-key-type, we set in the previous lesson.
data-previous-key-type is not complete yet. To correctly identify if previousKeyType is an operator, we need to update previousKeyType for each clicked key.
if (!action) {
  // ...
  calculator.dataset.previousKey = 'number'
}

if (action === 'decimal') {
  // ...
  calculator.dataset.previousKey = 'decimal'
}

if (action === 'clear') {
  // ...
  calculator.dataset.previousKeyType = 'clear'
}

if (action === 'calculate') {
 // ...
  calculator.dataset.previousKeyType = 'calculate'
}
Once we have the correct previousKeyType, we can use it to check if the previous key is an operator.
if (action === 'decimal') {
  if (!displayedNum.includes('.')) {
    display.textContent = displayedNum + '.'
  } else if (previousKeyType === 'operator') {
    display.textContent = '0.'
  }

calculator.dataset.previousKeyType = 'decimal'
}
What happens if Tim hits an operator key
If Tim hits an operator key first, the operator key should light up. (We’ve already covered for this edge case, but how? See if you can identify what we did).
Second, nothing should happen if Tim hits the same operator key multiple times. (We’ve already covered for this edge case as well).
Note: if you want to provide better UX, you can show the operator getting clicked on repeatedly with some CSS changes. We didn’t do it here, but see if you can program that yourself as an extra coding challenge.

Third, if Tim hits another operator key after hitting the first operator key, the first operator key should be released. Then, the second operator key should be depressed. (We covered for this edge case too — but how?).

Fourth, if Tim hits a number, an operator, a number and another operator, in that order, the display should be updated to a calculated value.
This means we need to use the calculate function when firstValue, operator and secondValue exist.
if (
  action === 'add' ||
  action === 'subtract' ||
  action === 'multiply' ||
  action === 'divide'
) {
  const firstValue = calculator.dataset.firstValue
  const operator = calculator.dataset.operator
  const secondValue = displayedNum

// Note: It's sufficient to check for firstValue and operator because secondValue always exists
  if (firstValue && operator) {
    display.textContent = calculate(firstValue, operator, secondValue)
  }

key.classList.add('is-depressed')
  calculator.dataset.previousKeyType = 'operator'
  calculator.dataset.firstValue = displayedNum
  calculator.dataset.operator = action
}
Although we can calculate a value when the operator key is clicked for a second time, we have also introduced a bug at this point — additional clicks on the operator key calculates a value when it shouldn’t.

To prevent the calculator from performing a calculation on subsequent clicks on the operator key, we need to check if the previousKeyType is an operator. If it is, we don’t perform a calculation.
if (
firstValue &&
operator &&
previousKeyType !== 'operator'
) {
display.textContent = calculate(firstValue, operator, secondValue)
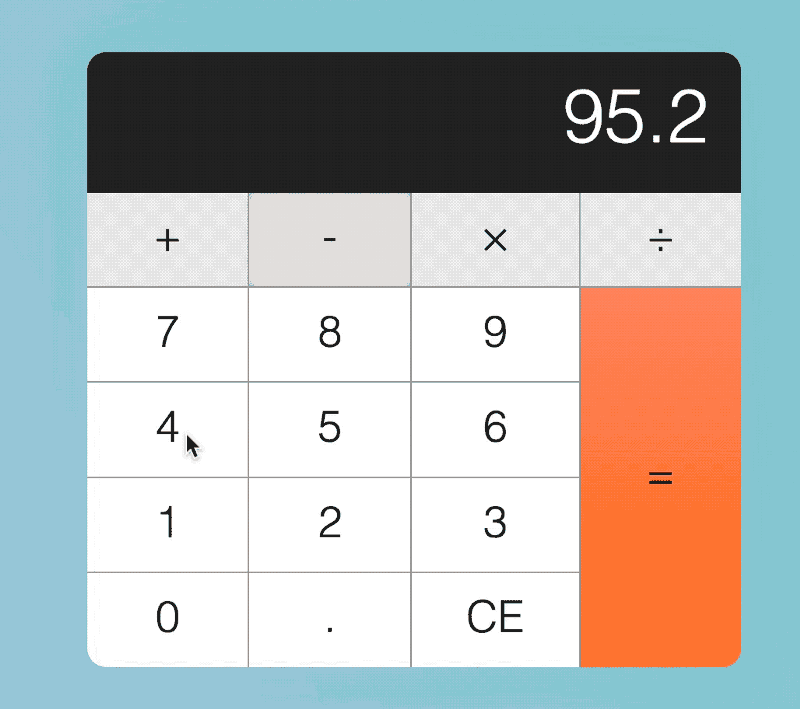
}Fifth, after the operator key calculates a number, if Tim hits on a number, followed by another operator, the operator should continue with the calculation, like this: 8 - 1 = 7, 7 - 2 = 5, 5 - 3 = 2.
Right now, our calculator cannot make consecutive calculations. The second calculated value is wrong. Here’s what we have: 99 - 1 = 98, 98 - 1 = 0.

The second value is calculated wrongly, because we fed the wrong values into the calculate function. Let’s go through a few pictures to understand what our code does.
Understanding our calculate function
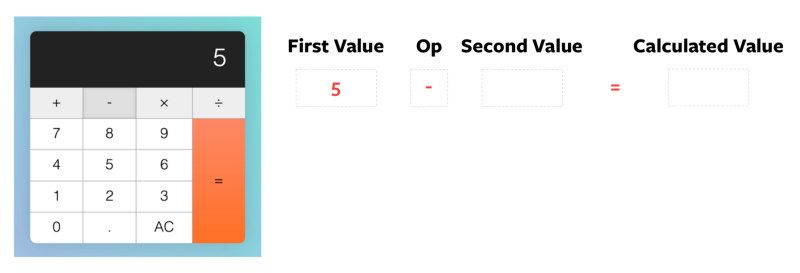
First, let’s say a user clicks on a number, 99. At this point, nothing is registered in the calculator yet.
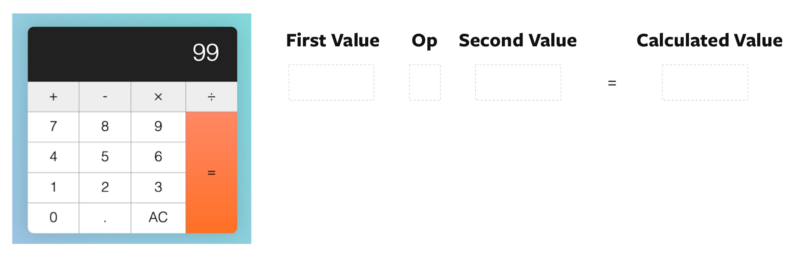
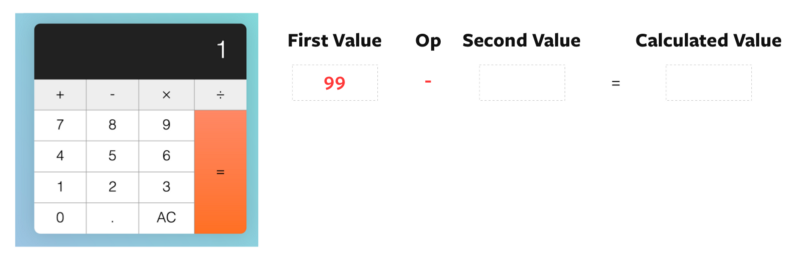
Second, let’s say the user clicks the subtract operator. After they click the subtract operator, we set firstValue to 99. We set also operator to subtract.

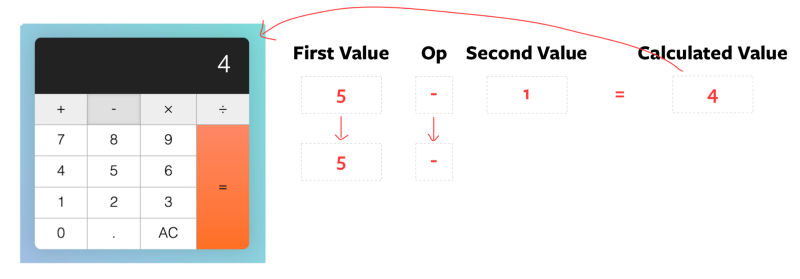
Third, let’s say the user clicks on a second value — this time, it’s 1. At this point, the displayed number gets updated to 1, but our firstValue, operator and secondValue remain unchanged.
Fourth, the user clicks on subtract again. Right after they click subtract, before we calculate the result, we set secondValue as the displayed number.
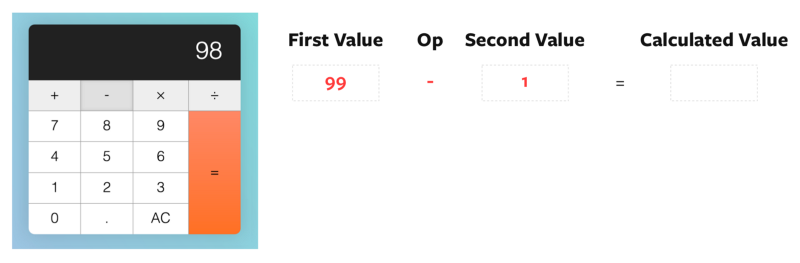
Fifth, we perform the calculation with firstValue 99, operator subtract, and secondValue 1. The result is 98.
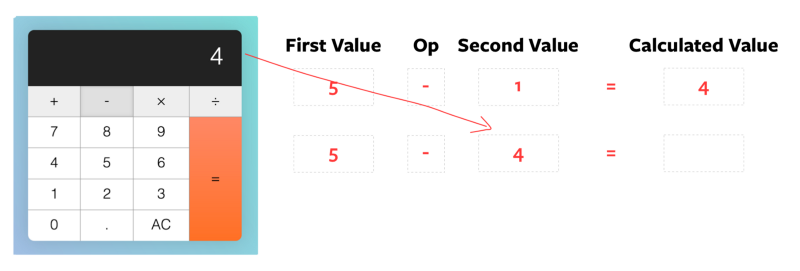
Once the result is calculated, we set the display to the result. Then, we set operator to subtract, and firstValue to the previous displayed number.
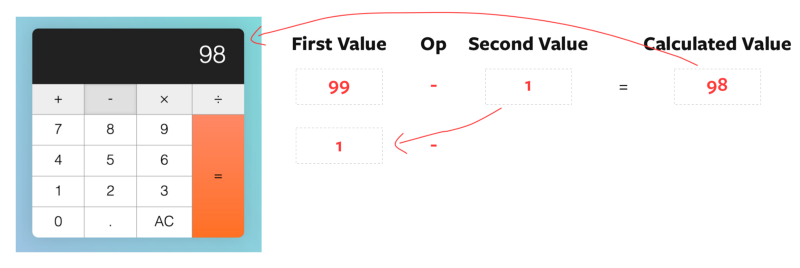
Well, that’s terribly wrong! If we want to continue with the calculation, we need to update firstValue with the calculated value.

const firstValue = calculator.dataset.firstValue
const operator = calculator.dataset.operator
const secondValue = displayedNum

if (
  firstValue &&
  operator &&
  previousKeyType !== 'operator'
) {
  const calcValue = calculate(firstValue, operator, secondValue)
  display.textContent = calcValue

// Update calculated value as firstValue
  calculator.dataset.firstValue = calcValue
} else {
  // If there are no calculations, set displayedNum as the firstValue
  calculator.dataset.firstValue = displayedNum
}

key.classList.add('is-depressed')
calculator.dataset.previousKeyType = 'operator'
calculator.dataset.operator = action
With this fix, consecutive calculations done by operator keys should now be correct.

What happens if Tim hits the equals key?
First, nothing should happen if Tim hits the equals key before any operator keys.
We know that operator keys have not been clicked yet if firstValue is not set to a number. We can use this knowledge to prevent the equals from calculating.
if (action === 'calculate') {
  const firstValue = calculator.dataset.firstValue
  const operator = calculator.dataset.operator
  const secondValue = displayedNum

if (firstValue) {
    display.textContent = calculate(firstValue, operator, secondValue)
  }

calculator.dataset.previousKeyType = 'calculate'
}
Second, if Tim hits a number, followed by an operator, followed by a equals, the calculator should calculate the result such that:
2 + =—>2 + 2 = 42 - =—>2 - 2 = 02 × =—>2 × 2 = 42 ÷ =—>2 ÷ 2 = 1

We have already taken this weird input into account. Can you understand why? :)
Third, if Tim hits the equals key after a calculation is completed, another calculation should be performed again. Here’s how the calculation should read:
- Tim hits keys 5–1
- Tim hits equal. Calculated value is
5 - 1 = 4 - Tim hits equal. Calculated value is
4 - 1 = 3 - Tim hits equal. Calculated value is
3 - 1 = 2 - Tim hits equal. Calculated value is
2 - 1 = 1 - Tim hits equal. Calculated value is
1 - 1 = 0

Unfortunately, our calculator messes this calculation up. Here’s what our calculator shows:
- Tim hits key 5–1
- Tim hits equal. Calculated value is
4 - Tim hits equal. Calculated value is
1

Correcting the calculation
First, let’s say our user clicks 5. At this point, nothing is registered in the calculator yet.
Second, let’s say the user clicks the subtract operator. After they click the subtract operator, we set firstValue to 5. We set also operator to subtract.
Third, the user clicks on a second value. Let’s say it’s 1. At this point, the displayed number gets updated to 1, but our firstValue, operator and secondValue remain unchanged.

Fourth, the user clicks the equals key. Right after they click equals, but before the calculation, we set secondValue as displayedNum

Fifth, the calculator calculates the result of 5 - 1 and gives 4. The result gets updated to the display. firstValue and operator get carried forward to the next calculation since we did not update them.
Sixth, when the user hits equals again, we set secondValue to displayedNum before the calculation.
You can tell what’s wrong here.
Instead of secondValue, we want the set firstValue to the displayed number.
if (action === 'calculate') {
  let firstValue = calculator.dataset.firstValue
  const operator = calculator.dataset.operator
  const secondValue = displayedNum

if (firstValue) {
    if (previousKeyType === 'calculate') {
      firstValue = displayedNum
    }

display.textContent = calculate(firstValue, operator, secondValue)
  }

calculator.dataset.previousKeyType = 'calculate'
}
We also want to carry forward the previous secondValue into the new calculation. For secondValue to persist to the next calculation, we need to store it in another custom attribute. Let’s call this custom attribute modValue (stands for modifier value).
if (action === 'calculate') {
  let firstValue = calculator.dataset.firstValue
  const operator = calculator.dataset.operator
  const secondValue = displayedNum

if (firstValue) {
    if (previousKeyType === 'calculate') {
      firstValue = displayedNum
    }

display.textContent = calculate(firstValue, operator, secondValue)
  }

// Set modValue attribute
  calculator.dataset.modValue = secondValue
  calculator.dataset.previousKeyType = 'calculate'
}
If the previousKeyType is calculate, we know we can use calculator.dataset.modValue as secondValue. Once we know this, we can perform the calculation.
if (firstValue) {
  if (previousKeyType === 'calculate') {
    firstValue = displayedNum
    secondValue = calculator.dataset.modValue
  }

display.textContent = calculate(firstValue, operator, secondValue)
}
With that, we have the correct calculation when the equals key is clicked consecutively.
Back to the equals key
Fourth, if Tim hits a decimal key or a number key after the calculator key, the display should be replaced with 0. or the new number respectively.
Here, instead of just checking if the previousKeyType is operator, we also need to check if it’s calculate.
if (!action) {
  if (
    displayedNum === '0' ||
    previousKeyType === 'operator' ||
    previousKeyType === 'calculate'
  ) {
    display.textContent = keyContent
  } else {
    display.textContent = displayedNum + keyContent
  }
  calculator.dataset.previousKeyType = 'number'
}

if (action === 'decimal') {
  if (!displayedNum.includes('.')) {
    display.textContent = displayedNum + '.'
  } else if (
    previousKeyType === 'operator' ||
    previousKeyType === 'calculate'
  ) {
    display.textContent = '0.'
  }

calculator.dataset.previousKeyType = 'decimal'
}
Fifth, if Tim hits an operator key right after the equals key, the calculator should not calculate.

To do this, we check if the previousKeyType is calculate before performing calculations with operator keys.
if (
  action === 'add' ||
  action === 'subtract' ||
  action === 'multiply' ||
  action === 'divide'
) {
  // ...

if (
    firstValue &&
    operator &&
    previousKeyType !== 'operator' &&
    previousKeyType !== 'calculate'
  ) {
    const calcValue = calculate(firstValue, operator, secondValue)
    display.textContent = calcValue
    calculator.dataset.firstValue = calcValue
  } else {
    calculator.dataset.firstValue = displayedNum
  }

// ...
}
The clear key has two uses:
- All Clear (denoted by
AC) clears everything and resets the calculator to its initial state. - Clear entry (denoted by
CE) clears the current entry. It keeps previous numbers in memory.
When the calculator is in its default state, AC should be shown.
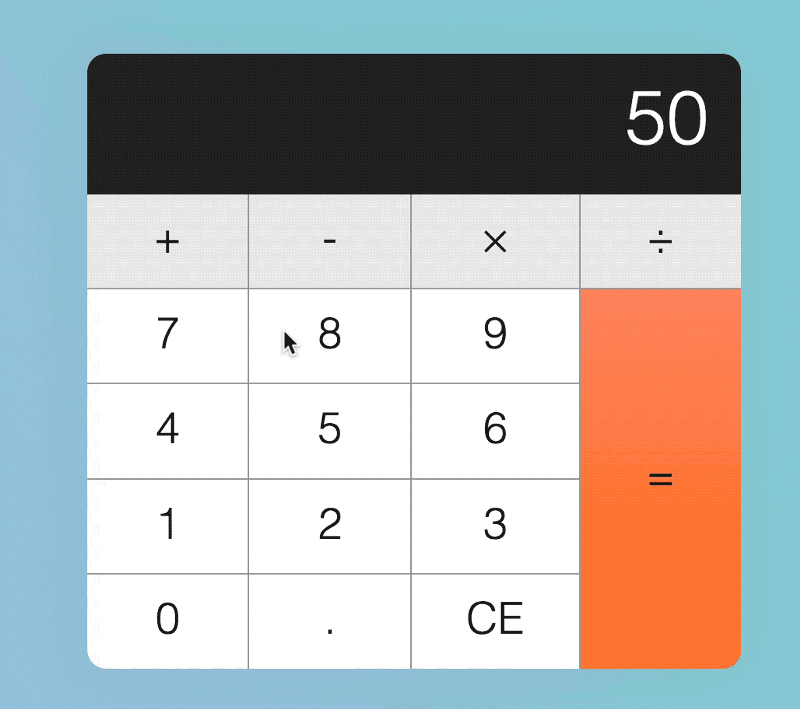
First, if Tim hits a key (any key except clear), AC should be changed to CE.
We do this by checking if the data-action is clear. If it’s not clear, we look for the clear button and change its textContent.
if (action !== 'clear') {
  const clearButton = calculator.querySelector('[data-action=clear]')
  clearButton.textContent = 'CE'
}
Second, if Tim hits CE, the display should read 0. At the same time, CE should be reverted to AC so Tim can reset the calculator to its initial state.**

if (action === 'clear') {
  display.textContent = 0
  key.textContent = 'AC'
  calculator.dataset.previousKeyType = 'clear'
}
Third, if Tim hits AC, reset the calculator to its initial state.
To reset the calculator to its initial state, we need to clear all custom attributes we’ve set.
if (action === 'clear') {
  if (key.textContent === 'AC') {
    calculator.dataset.firstValue = ''
    calculator.dataset.modValue = ''
    calculator.dataset.operator = ''
    calculator.dataset.previousKeyType = ''
  } else {
    key.textContent = 'AC'
  }

display.textContent = 0
  calculator.dataset.previousKeyType = 'clear'
}
That’s it — for the edge cases portion, anyway!
You can grab the source code for the edge cases part through this link (scroll down and enter your email address in the box, and I’ll send the source codes right to your mailbox).
At this point, the code we created together is quite confusing. You’ll probably get lost if you try to read the code on your own. Let’s refactor it to make it cleaner.
Refactoring the code
When you refactor, you’ll often start with the most obvious improvements. In this case, let’s start with calculate.
Before continuing on, make sure you know these JavaScript practices/features. We’ll use them in the refactor.
- Early returns
- Ternary operators
- Pure functions
- ES6 Destructuring
With that, let’s begin!
Refactoring the calculate function
Here’s what we have so far.
const calculate = (n1, operator, n2) => {
  let result = ''
  if (operator === 'add') {
    result = firstNum + parseFloat(n2)
  } else if (operator === 'subtract') {
    result = parseFloat(n1) - parseFloat(n2)
  } else if (operator === 'multiply') {
    result = parseFloat(n1) * parseFloat(n2)
  } else if (operator === 'divide') {
    result = parseFloat(n1) / parseFloat(n2)
  }

  return result
}
You learned that we should reduce reassignments as much as possible. Here, we can remove assignments if we return the result of the calculation within the if and else if statements:
const calculate = (n1, operator, n2) => {
  if (operator === 'add') {
    return firstNum + parseFloat(n2)
  } else if (operator === 'subtract') {
    return parseFloat(n1) - parseFloat(n2)
  } else if (operator === 'multiply') {
    return parseFloat(n1) * parseFloat(n2)
  } else if (operator === 'divide') {
    return parseFloat(n1) / parseFloat(n2)
  }
}
Since we return all values, we can use early returns. If we do so, there’s no need for any else if conditions.
const calculate = (n1, operator, n2) => {
  if (operator === 'add') {
    return firstNum + parseFloat(n2)
  }

  if (operator === 'subtract') {
    return parseFloat(n1) - parseFloat(n2)
  }

  if (operator === 'multiply') {
    return parseFloat(n1) * parseFloat(n2)
  }

  if (operator === 'divide') {
    return parseFloat(n1) / parseFloat(n2)
  }
}
And since we have one statement per if condition, we can remove the brackets. (Note: some developers swear by curly brackets, though). Here's what the code would look like:
const calculate = (n1, operator, n2) => {
  if (operator === 'add') return parseFloat(n1) + parseFloat(n2)
  if (operator === 'subtract') return parseFloat(n1) - parseFloat(n2)
  if (operator === 'multiply') return parseFloat(n1) * parseFloat(n2)
  if (operator === 'divide') return parseFloat(n1) / parseFloat(n2)
}
Finally, we called parseFloat eight times in the function. We can simplify it by creating two variables to contain float values:
const calculate = (n1, operator, n2) => {
  const firstNum = parseFloat(n1)
  const secondNum = parseFloat(n2)
  if (operator === 'add') return firstNum + secondNum
  if (operator === 'subtract') return firstNum - secondNum
  if (operator === 'multiply') return firstNum * secondNum
  if (operator === 'divide') return firstNum / secondNum
}
We’re done with calculate now. Don't you think it's easier to read compared to before?
Refactoring the event listener
The code we created for the event listener is huge. Here’s what we have at the moment:
keys.addEventListener('click', e => {
  if (e.target.matches('button')) {

    if (!action) { /* ... */ }

    if (action === 'add' ||
      action === 'subtract' ||
      action === 'multiply' ||
      action === 'divide') {
      /* ... */
    }

    if (action === 'clear') { /* ... */ }
    if (action !== 'clear') { /* ... */ }
    if (action === 'calculate') { /* ... */ }
  }
})
How do you begin refactoring this piece of code? If you don’t know any programming best practices, you may be tempted to refactor by splitting up each kind of action into a smaller function:
// Don't do this!
const handleNumberKeys = (/* ... */) => {/* ... */}
const handleOperatorKeys = (/* ... */) => {/* ... */}
const handleDecimalKey = (/* ... */) => {/* ... */}
const handleClearKey = (/* ... */) => {/* ... */}
const handleCalculateKey = (/* ... */) => {/* ... */}
Don’t do this. It doesn’t help, because you’re merely splitting up blocks of code. When you do so, the function gets harder to read.
A better way is to split the code into pure and impure functions. If you do so, you’ll get code that looks like this:
keys.addEventListener('click', e => {
  // Pure function
  const resultString = createResultString(/* ... */)

  // Impure stuff
  display.textContent = resultString
  updateCalculatorState(/* ... */)
})
Here, createResultString is a pure function that returns what needs to be displayed on the calculator. updateCalculatorState is an impure function that changes the calculator's visual appearance and custom attributes.
Making createResultString
As mentioned before, createResultString should return the value that needs to be displayed on the calculator.
You can get these values through parts of the code that says display.textContent = 'some value.
display.textContent = 'some value'Instead of display.textContent = 'some value', we want to return each value so we can use it later.
// replace the above with this
return 'some value'
Let’s go through this together, step by step, starting with number keys.
Making the result string for number keys
Here’s the code we have for number keys:
if (!action) {
  if (
    displayedNum === '0' ||
    previousKeyType === 'operator' ||
    previousKeyType === 'calculate'
  ) {
    display.textContent = keyContent
  } else {
    display.textContent = displayedNum + keyContent
  }
  calculator.dataset.previousKeyType = 'number'
}
The first step is to copy parts that say display.textContent = 'some value' into createResultString. When you do this, make sure you change display.textContent = into return.
const createResultString = () => {
  if (!action) {
    if (
      displayedNum === '0' ||
      previousKeyType === 'operator' ||
      previousKeyType === 'calculate'
    ) {
      return keyContent
    } else {
      return displayedNum + keyContent
    }
  }
}
Next, we can convert the if/else statement to a ternary operator:
const createResultString = () => {
  if (action!) {
    return displayedNum === '0' ||
      previousKeyType === 'operator' ||
      previousKeyType === 'calculate'
      ? keyContent
      : displayedNum + keyContent
  }
}
When you refactor, remember to note down a list of variables you need. We’ll come back to the list later.
const createResultString = () => {
  // Variables required are:
  // 1. keyContent
  // 2. displayedNum
  // 3. previousKeyType
  // 4. action

  if (action!) {
    return displayedNum === '0' ||
      previousKeyType === 'operator' ||
      previousKeyType === 'calculate'
      ? keyContent
      : displayedNum + keyContent
  }
}
Making the result string for the decimal key
Here’s the code we have for the decimal key:
if (action === 'decimal') {
  if (!displayedNum.includes('.')) {
    display.textContent = displayedNum + '.'
  } else if (
    previousKeyType === 'operator' ||
    previousKeyType === 'calculate'
  ) {
    display.textContent = '0.'
  }

  calculator.dataset.previousKeyType = 'decimal'
}
As before, we want to move anything that changes display.textContentinto createResultString.
const createResultString = () => {
  // ...

  if (action === 'decimal') {
    if (!displayedNum.includes('.')) {
      return = displayedNum + '.'
    } else if (previousKeyType === 'operator' || previousKeyType === 'calculate') {
      return = '0.'
    }
  }
}
Since we want to return all values, we can convert else if statements into early returns.
const createResultString = () => {
  // ...

  if (action === 'decimal') {
    if (!displayedNum.includes('.')) return displayedNum + '.'
    if (previousKeyType === 'operator' || previousKeyType === 'calculate') return '0.'
  }
}
A common mistake here is to forget to return the currently displayed number when neither condition is matched. We need this because we will replace the display.textContent with the value returned from createResultString. If we missed it, createResultString will return undefined, which is not what we desire.
const createResultString = () => {
  // ...

  if (action === 'decimal') {
    if (!displayedNum.includes('.')) return displayedNum + '.'
    if (previousKeyType === 'operator' || previousKeyType === 'calculate') return '0.'
    return displayedNum
  }
}
As always, take note of the variables that are required. At this point, the required variables remain the same as before:
const createResultString = () => {
  // Variables required are:
  // 1. keyContent
  // 2. displayedNum
  // 3. previousKeyType
  // 4. action
}
Making the result string for operator keys
Here’s the code we wrote for operator keys.
if (
  action === 'add' ||
  action === 'subtract' ||
  action === 'multiply' ||
  action === 'divide'
) {
  const firstValue = calculator.dataset.firstValue
  const operator = calculator.dataset.operator
  const secondValue = displayedNum

  if (
    firstValue &&
    operator &&
    previousKeyType !== 'operator' &&
    previousKeyType !== 'calculate'
  ) {
    const calcValue = calculate(firstValue, operator, secondValue)
    display.textContent = calcValue
    calculator.dataset.firstValue = calcValue
  } else {
    calculator.dataset.firstValue = displayedNum
  }

  key.classList.add('is-depressed')
  calculator.dataset.previousKeyType = 'operator'
  calculator.dataset.operator = action
}
You know the drill by now: we want to move everything that changes display.textContent into createResultString. Here's what needs to be moved:
const createResultString = () => {
  // ...
  if (
    action === 'add' ||
    action === 'subtract' ||
    action === 'multiply' ||
    action === 'divide'
  ) {
    const firstValue = calculator.dataset.firstValue
    const operator = calculator.dataset.operator
    const secondValue = displayedNum

    if (
      firstValue &&
      operator &&
      previousKeyType !== 'operator' &&
      previousKeyType !== 'calculate'
    ) {
      return calculate(firstValue, operator, secondValue)
    }
  }
}
Remember, createResultString needs to return the value to be displayed on the calculator. If the if condition did not match, we still want to return the displayed number.
const createResultString = () => {
  // ...
  if (
    action === 'add' ||
    action === 'subtract' ||
    action === 'multiply' ||
    action === 'divide'
  ) {
    const firstValue = calculator.dataset.firstValue
    const operator = calculator.dataset.operator
    const secondValue = displayedNum

    if (
      firstValue &&
      operator &&
      previousKeyType !== 'operator' &&
      previousKeyType !== 'calculate'
    ) {
      return calculate(firstValue, operator, secondValue)
    } else {
      return displayedNum
    }
  }
}
We can then refactor the if/else statement into a ternary operator:
const createResultString = () => {
  // ...
  if (
    action === 'add' ||
    action === 'subtract' ||
    action === 'multiply' ||
    action === 'divide'
  ) {
    const firstValue = calculator.dataset.firstValue
    const operator = calculator.dataset.operator
    const secondValue = displayedNum

    return firstValue &&
      operator &&
      previousKeyType !== 'operator' &&
      previousKeyType !== 'calculate'
      ? calculate(firstValue, operator, secondValue)
      : displayedNum
  }
}
If you look closely, you’ll realize that there’s no need to store a secondValuevariable. We can use displayedNum directly in the calculate function.
const createResultString = () => {
  // ...
  if (
    action === 'add' ||
    action === 'subtract' ||
    action === 'multiply' ||
    action === 'divide'
  ) {
    const firstValue = calculator.dataset.firstValue
    const operator = calculator.dataset.operator

    return firstValue &&
      operator &&
      previousKeyType !== 'operator' &&
      previousKeyType !== 'calculate'
      ? calculate(firstValue, operator, displayedNum)
      : displayedNum
  }
}
Finally, take note of the variables and properties required. This time, we need calculator.dataset.firstValue and calculator.dataset.operator.
const createResultString = () => {
  // Variables & properties required are:
  // 1. keyContent
  // 2. displayedNum
  // 3. previousKeyType
  // 4. action
  // 5. calculator.dataset.firstValue
  // 6. calculator.dataset.operator
}
Making the result string for the clear key
We wrote the following code to handle the clear key.
if (action === 'clear') {
  if (key.textContent === 'AC') {
    calculator.dataset.firstValue = ''
    calculator.dataset.modValue = ''
    calculator.dataset.operator = ''
    calculator.dataset.previousKeyType = ''
  } else {
    key.textContent = 'AC'
  }

  display.textContent = 0
  calculator.dataset.previousKeyType = 'clear'
}
As above, want to move everything that changes display.textContentinto createResultString.
const createResultString = () => {
  // ...
  if (action === 'clear') return 0
}
Making the result string for the equals key
Here’s the code we wrote for the equals key:
if (action === 'calculate') {
  let firstValue = calculator.dataset.firstValue
  const operator = calculator.dataset.operator
  let secondValue = displayedNum

  if (firstValue) {
    if (previousKeyType === 'calculate') {
      firstValue = displayedNum
      secondValue = calculator.dataset.modValue
    }

    display.textContent = calculate(firstValue, operator, secondValue)
  }

  calculator.dataset.modValue = secondValue
  calculator.dataset.previousKeyType = 'calculate'
}
As above, we want to copy everything that changes display.textContentinto createResultString. Here's what needs to be copied:
if (action === 'calculate') {
  let firstValue = calculator.dataset.firstValue
  const operator = calculator.dataset.operator
  let secondValue = displayedNum

  if (firstValue) {
    if (previousKeyType === 'calculate') {
      firstValue = displayedNum
      secondValue = calculator.dataset.modValue
    }
    display.textContent = calculate(firstValue, operator, secondValue)
  }
}
When copying the code into createResultString, make sure you return values for every possible scenario:
const createResultString = () => {
  // ...

  if (action === 'calculate') {
    let firstValue = calculator.dataset.firstValue
    const operator = calculator.dataset.operator
    let secondValue = displayedNum

    if (firstValue) {
      if (previousKeyType === 'calculate') {
        firstValue = displayedNum
        secondValue = calculator.dataset.modValue
      }
      return calculate(firstValue, operator, secondValue)
    } else {
      return displayedNum
    }
  }
}
Next, we want to reduce reassignments. We can do so by passing in the correct values into calculate through a ternary operator.
const createResultString = () => {
  // ...

  if (action === 'calculate') {
    const firstValue = calculator.dataset.firstValue
    const operator = calculator.dataset.operator
    const modValue = calculator.dataset.modValue

    if (firstValue) {
      return previousKeyType === 'calculate'
        ? calculate(displayedNum, operator, modValue)
        : calculate(firstValue, operator, displayedNum)
    } else {
      return displayedNum
    }
  }
}
You can further simplify the above code with another ternary operator if you feel comfortable with it:
const createResultString = () => {
  // ...

  if (action === 'calculate') {
    const firstValue = calculator.dataset.firstValue
    const operator = calculator.dataset.operator
    const modValue = calculator.dataset.modValue

    return firstValue
      ? previousKeyType === 'calculate'
        ? calculate(displayedNum, operator, modValue)
        : calculate(firstValue, operator, displayedNum)
      : displayedNum
  }
}
At this point, we want to take note of the properties and variables required again:
const createResultString = () => {
  // Variables & properties required are:
  // 1. keyContent
  // 2. displayedNum
  // 3. previousKeyType
  // 4. action
  // 5. calculator.dataset.firstValue
  // 6. calculator.dataset.operator
  // 7. calculator.dataset.modValue
}
Passing in necessary variables
We need seven properties/variables in createResultString:
keyContentdisplayedNumpreviousKeyTypeactionfirstValuemodValueoperator
We can get keyContent and action from key. We can also get firstValue, modValue, operator and previousKeyType from calculator.dataset.
That means the createResultString function needs three variables—key, displayedNum and calculator.dataset. Since calculator.datasetrepresents the state of the calculator, let's use a variable called stateinstead.
const createResultString = (key, displayedNum, state) => {
  const keyContent = key.textContent
  const action = key.dataset.action
  const firstValue = state.firstValue
  const modValue = state.modValue
  const operator = state.operator
  const previousKeyType = state.previousKeyType
  // ... Refactor as necessary
}

// Using createResultString
keys.addEventListener('click', e => {
  if (e.target.matches('button')) return
  const displayedNum = display.textContent
  const resultString = createResultString(e.target, displayedNum, calculator.dataset)

  // ...
})
Feel free to destructure variables if you desire:
const createResultString = (key, displayedNum, state) => {
  const keyContent = key.textContent
  const { action } = key.dataset
  const {
    firstValue,
    modValue,
    operator,
    previousKeyType
  } = state

  // ...
}
Consistency within if statements
In createResultString, we used the following conditions to test for the type of keys that were clicked:
// If key is number
if (!action) { /* ... */ }

// If key is decimal
if (action === 'decimal') { /* ... */ }

// If key is operator
if (
  action === 'add' ||
  action === 'subtract' ||
  action === 'multiply' ||
  action === 'divide'
) { /* ... */}

// If key is clear
if (action === 'clear') { /* ... */ }

// If key is calculate
if (action === 'calculate') { /* ... */ }
They’re not consistent, so they’re hard to read. If possible, we want to make them consistent so we can write something like this:
if (keyType === 'number') { /* ... */ }
if (keyType === 'decimal') { /* ... */ }
if (keyType === 'operator') { /* ... */}
if (keyType === 'clear') { /* ... */ }
if (keyType === 'calculate') { /* ... */ }
To do so, we can create a function called getKeyType. This function should return the type of key that was clicked.
const getKeyType = (key) => {
  const { action } = key.dataset
  if (!action) return 'number'
  if (
    action === 'add' ||
    action === 'subtract' ||
    action === 'multiply' ||
    action === 'divide'
  ) return 'operator'
  // For everything else, return the action
  return action
}
Here’s how you’d use the function:
const createResultString = (key, displayedNum, state) => {
  const keyType = getKeyType(key)

  if (keyType === 'number') { /* ... */ }
  if (keyType === 'decimal') { /* ... */ }
  if (keyType === 'operator') { /* ... */}
  if (keyType === 'clear') { /* ... */ }
  if (keyType === 'calculate') { /* ... */ }
}
We’re done with createResultString. Let's move on to updateCalculatorState.
Making updateCalculatorState
updateCalculatorState is a function that changes the calculator's visual appearance and custom attributes.
As with createResultString, we need to check the type of key that was clicked. Here, we can reuse getKeyType.
const updateCalculatorState = (key) => {
  const keyType = getKeyType(key)

  if (keyType === 'number') { /* ... */ }
  if (keyType === 'decimal') { /* ... */ }
  if (keyType === 'operator') { /* ... */}
  if (keyType === 'clear') { /* ... */ }
  if (keyType === 'calculate') { /* ... */ }
}
If you look at the leftover code, you may notice we change data-previous-key-type for every type of key. Here's what the code looks like:
const updateCalculatorState = (key, calculator) => {
  const keyType = getKeyType(key)

  if (!action) {
    // ...
    calculator.dataset.previousKeyType = 'number'
  }

  if (action === 'decimal') {
    // ...
    calculator.dataset.previousKeyType = 'decimal'
  }

  if (
    action === 'add' ||
    action === 'subtract' ||
    action === 'multiply' ||
    action === 'divide'
  ) {
    // ...
    calculator.dataset.previousKeyType = 'operator'
  }

  if (action === 'clear') {
    // ...
    calculator.dataset.previousKeyType = 'clear'
  }

  if (action === 'calculate') {
    calculator.dataset.previousKeyType = 'calculate'
  }
}
This is redundant because we already know the key type with getKeyType. We can refactor the above to:
const updateCalculatorState = (key, calculator) => {
  const keyType = getKeyType(key)
  calculator.dataset.previousKeyType = keyType

  if (keyType === 'number') { /* ... */ }
  if (keyType === 'decimal') { /* ... */ }
  if (keyType === 'operator') { /* ... */}
  if (keyType === 'clear') { /* ... */ }
  if (keyType === 'calculate') { /* ... */ }
}
Making updateCalculatorState for operator keys
Visually, we need to make sure all keys release their depressed state. Here, we can copy and paste the code we had before:
const updateCalculatorState = (key, calculator) => {
  const keyType = getKeyType(key)
  calculator.dataset.previousKeyType = keyType

  Array.from(key.parentNode.children).forEach(k => k.classList.remove('is-depressed'))
}
Here’s what’s left from what we’ve written for operator keys, after moving pieces related to display.textContent into createResultString.
if (keyType === 'operator') {
  if (firstValue &&
      operator &&
      previousKeyType !== 'operator' &&
      previousKeyType !== 'calculate'
  ) {
    calculator.dataset.firstValue = calculatedValue
  } else {
    calculator.dataset.firstValue = displayedNum
  }

  key.classList.add('is-depressed')
  calculator.dataset.operator = key.dataset.action
}
You may notice that we can shorten the code with a ternary operator:
if (keyType === 'operator') {
  key.classList.add('is-depressed')
  calculator.dataset.operator = key.dataset.action
  calculator.dataset.firstValue = firstValue &&
    operator &&
    previousKeyType !== 'operator' &&
    previousKeyType !== 'calculate'
    ? calculatedValue
    : displayedNum
}
As before, take note of the variables and properties you need. Here, we need calculatedValue and displayedNum.
const updateCalculatorState = (key, calculator) => {
  // Variables and properties needed
  // 1. key
  // 2. calculator
  // 3. calculatedValue
  // 4. displayedNum
}
Making updateCalculatorState for the clear key
Here’s the leftover code for the clear key:
if (action === 'clear') {
  if (key.textContent === 'AC') {
    calculator.dataset.firstValue = ''
    calculator.dataset.modValue = ''
    calculator.dataset.operator = ''
    calculator.dataset.previousKeyType = ''
  } else {
    key.textContent = 'AC'
  }
}

if (action !== 'clear') {
  const clearButton = calculator.querySelector('[data-action=clear]')
  clearButton.textContent = 'CE'
}
There’s nothing much we can refactor here. Feel free to copy/paste everything into updateCalculatorState.
Making updateCalculatorState for the equals key
Here’s the code we wrote for the equals key:
if (action === 'calculate') {
  let firstValue = calculator.dataset.firstValue
  const operator = calculator.dataset.operator
  let secondValue = displayedNum

  if (firstValue) {
    if (previousKeyType === 'calculate') {
      firstValue = displayedNum
      secondValue = calculator.dataset.modValue
    }

    display.textContent = calculate(firstValue, operator, secondValue)
  }

  calculator.dataset.modValue = secondValue
  calculator.dataset.previousKeyType = 'calculate'
}
Here’s what we’re left with if we remove everything that concerns display.textContent.
if (action === 'calculate') {
  let secondValue = displayedNum

  if (firstValue) {
    if (previousKeyType === 'calculate') {
      secondValue = calculator.dataset.modValue
    }
  }

  calculator.dataset.modValue = secondValue
}
We can refactor this into the following:
if (keyType === 'calculate') {
  calculator.dataset.modValue = firstValue && previousKeyType === 'calculate'
    ? modValue
    : displayedNum
}
As always, take note of the properties and variables used:
const updateCalculatorState = (key, calculator) => {
  // Variables and properties needed
  // 1. key
  // 2. calculator
  // 3. calculatedValue
  // 4. displayedNum
  // 5. modValue
}
Passing in necessary variables
We know we need five variables/properties for updateCalculatorState:
keycalculatorcalculatedValuedisplayedNummodValue
Since modValue can be retrieved from calculator.dataset, we only need to pass in four values:
const updateCalculatorState = (key, calculator, calculatedValue, displayedNum) => {
  // ...
}

keys.addEventListener('click', e => {
  if (e.target.matches('button')) return

  const key = e.target
  const displayedNum = display.textContent
  const resultString = createResultString(key, displayedNum, calculator.dataset)

  display.textContent = resultString

  // Pass in necessary values
  updateCalculatorState(key, calculator, resultString, displayedNum)
})
Refactoring updateCalculatorState again
We changed three kinds of values in updateCalculatorState:
calculator.dataset- The class for pressing/depressing operators
ACvsCEtext
If you want to make it cleaner, you can split (2) and (3) into another function — updateVisualState. Here's what updateVisualState can look like:
const updateVisualState = (key, calculator) => {
  const keyType = getKeyType(key)
  Array.from(key.parentNode.children).forEach(k => k.classList.remove('is-depressed'))

  if (keyType === 'operator') key.classList.add('is-depressed')

  if (keyType === 'clear' && key.textContent !== 'AC') {
    key.textContent = 'AC'
  }

  if (keyType !== 'clear') {
    const clearButton = calculator.querySelector('[data-action=clear]')
    clearButton.textContent = 'CE'
  }
}
Wrapping up
The code become much cleaner after the refactor. If you look into the event listener, you’ll know what each function does. Here’s what the event listener looks like at the end:
keys.addEventListener('click', e => {
  if (e.target.matches('button')) return
  const key = e.target
  const displayedNum = display.textContent

  // Pure functions
  const resultString = createResultString(key, displayedNum, calculator.dataset)

  // Update states
  display.textContent = resultString
  updateCalculatorState(key, calculator, resultString, displayedNum)
  updateVisualState(key, calculator)
})

